
I’ve always believed that braids are the ultimate hair hack. They can transform a simple ponytail into a masterpiece, tame a bad hair day, or add a touch of elegance to any outfit. Whether you’re a braiding beginner or a seasoned pro, there’s a style on this list with your name on it.
I’ve gathered my favorite braided looks, from easy everyday styles to stunning creations perfect for a special event. These ideas are all about working with what you have and having fun with your hair. Let’s dive in and find your next signature braid.
[[IMG:IMG01]]
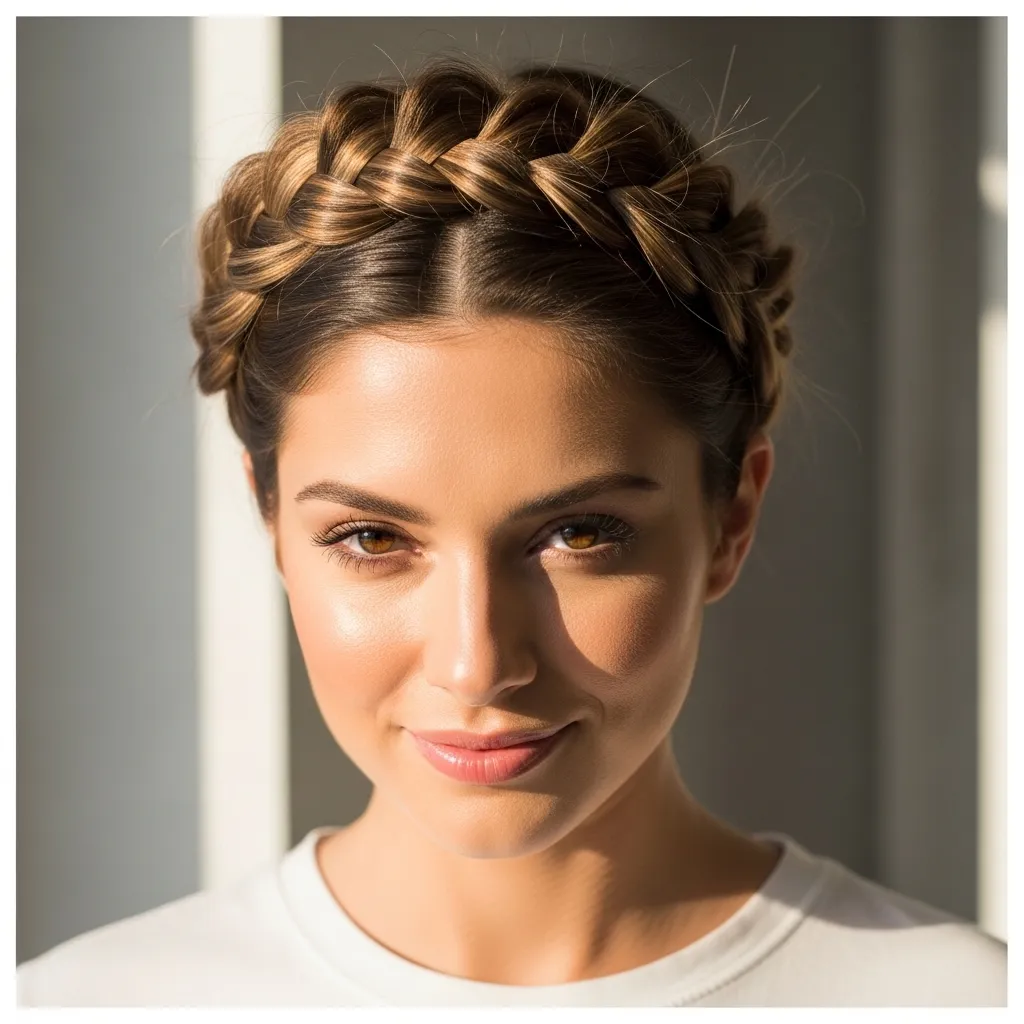
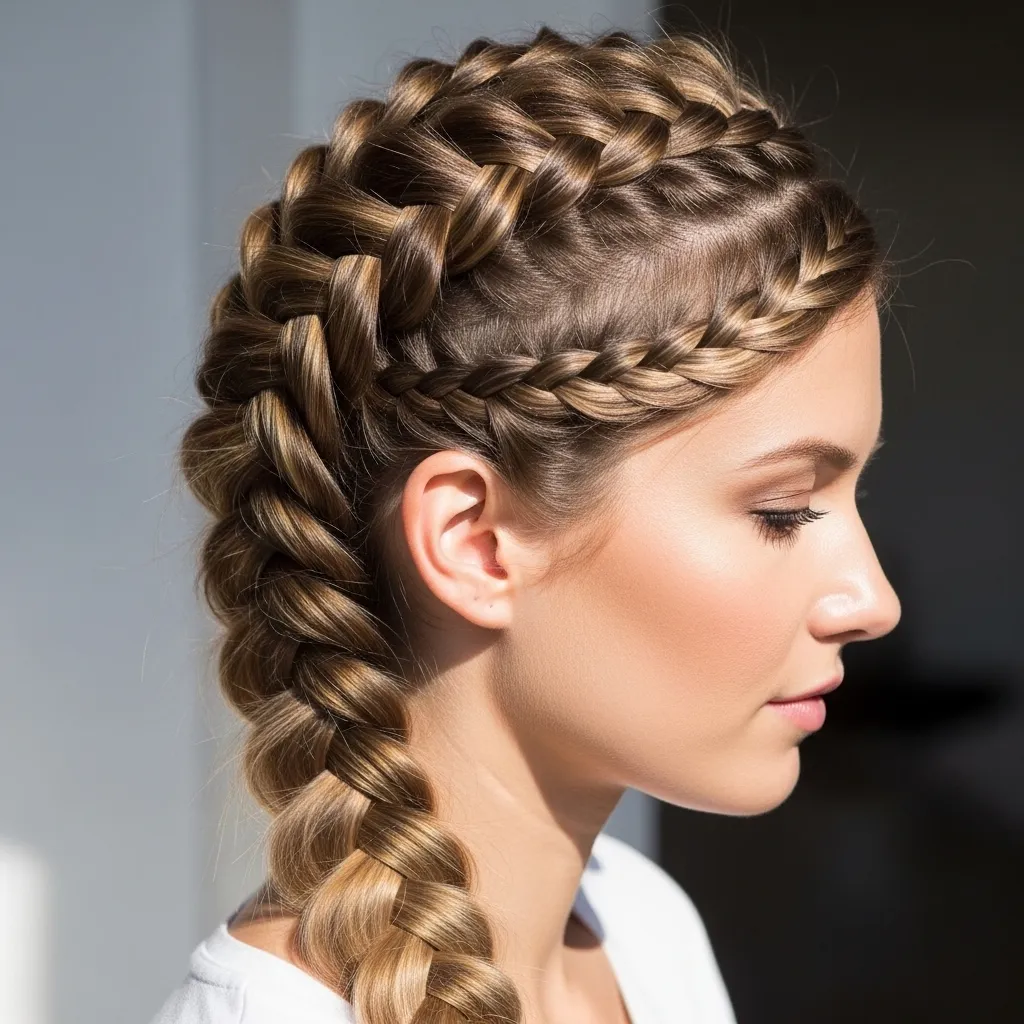
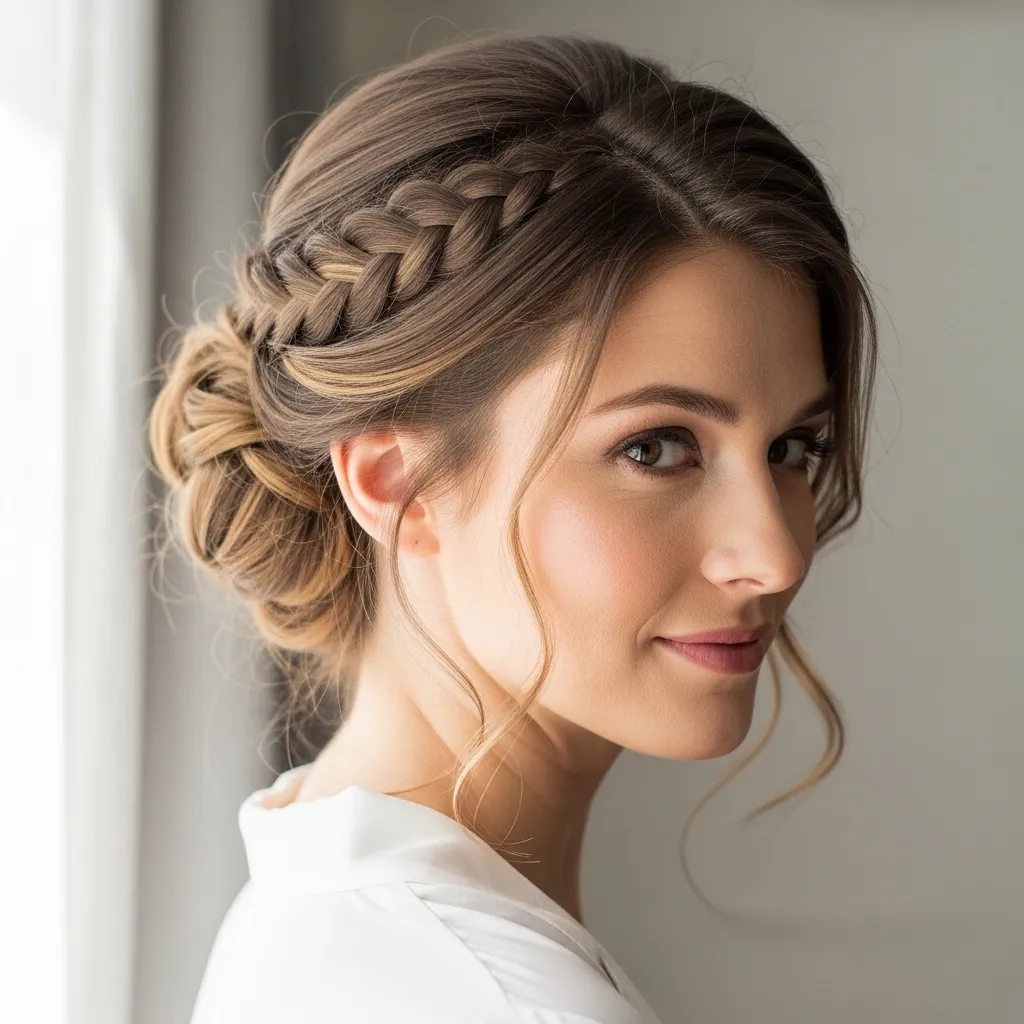
1. The Classic French Braid Crown
This timeless style is my go-to for a romantic, bohemian vibe. It keeps hair completely off your face while looking effortlessly chic. I love it for everything from farmers’ markets to outdoor weddings.
Start by parting your hair down the middle. Create a French braid on one side, starting at your temple and working your way around the back of your head to the opposite side. Repeat on the other side, then tuck the ends under and secure with bobby pins. Gently pull on the braid loops for a fuller, softer look.
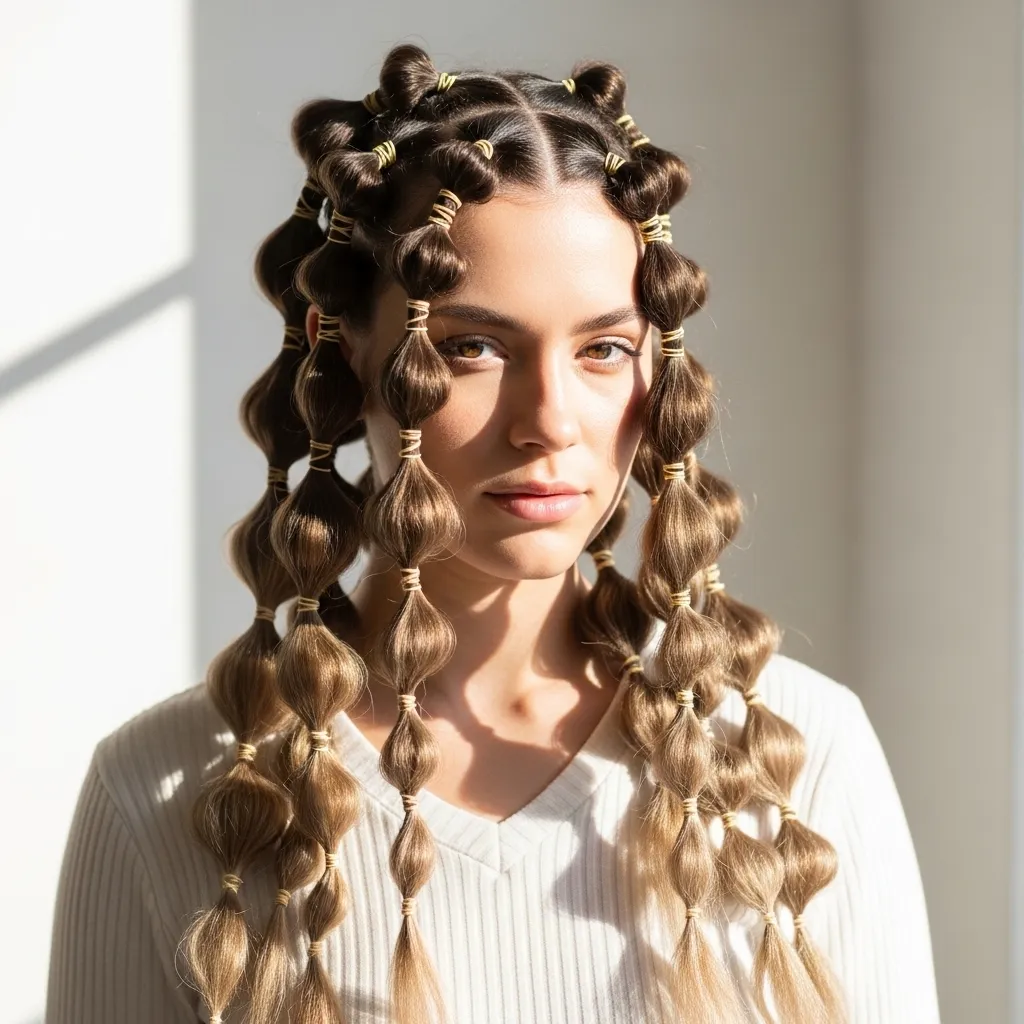
2. The Chunky Bubble Braids
Playful, modern, and surprisingly simple, bubble braids are a huge trend for a reason. They add instant volume and a fun texture to any length of hair. This is my favorite style for festivals or a fun day out.
Simply create two high pigtails (or one for a ponytail version). Space hair ties down the length of each tail, about two inches apart. Then, gently pull and puff out the hair between each tie to create the “bubbles.” The bigger you pull, the more dramatic the effect!
3. The Elegant Rope Braid Bun
When I need a super polished updo, this is what I do. The rope braid technique looks intricate but is deceptively easy. It creates a sleek, textured bun that holds all day.
Twist two sections of hair around each other to form a rope braid down the length of a low ponytail. Then, wrap the braid around the base to form a bun and pin it securely. For extra hold and shine, use a light-hold gel or pomade on the strands before twisting.
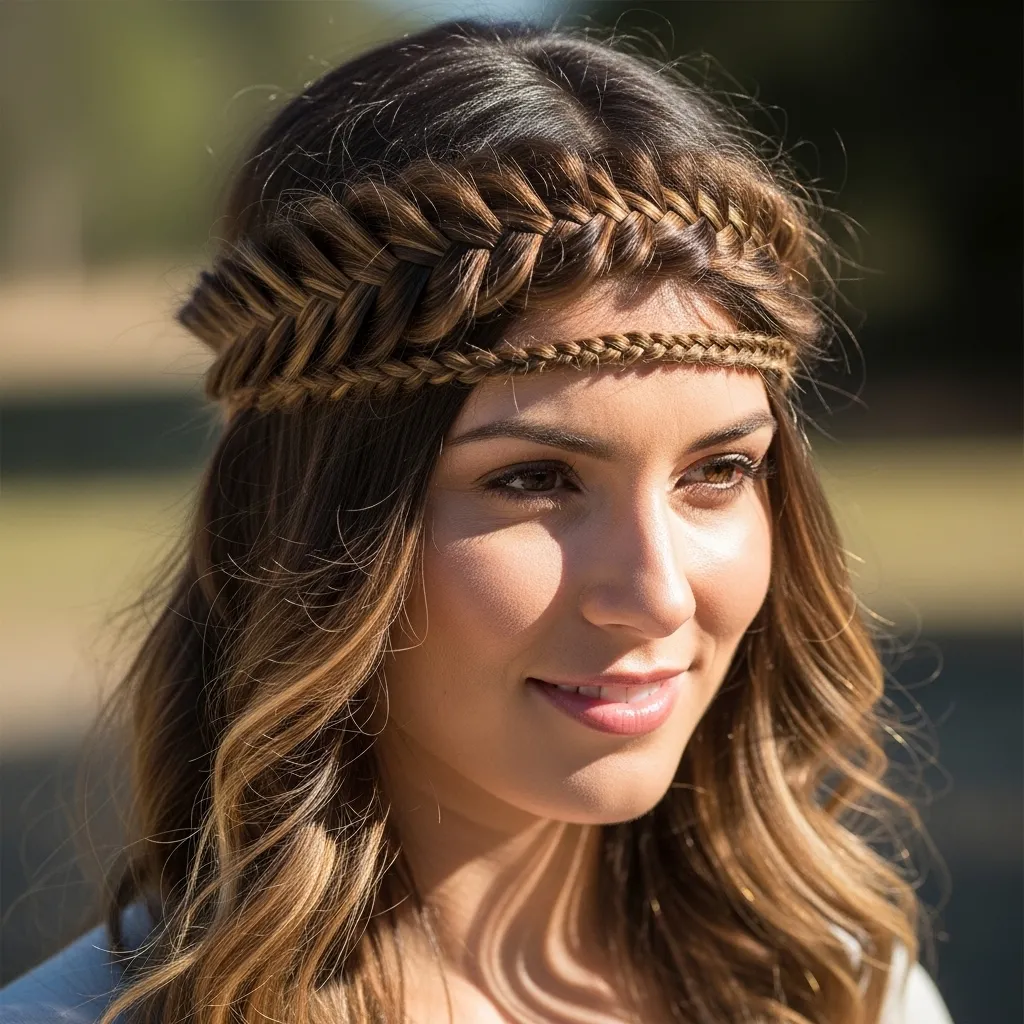
4. The Boho Fishtail Headband
This is the perfect solution for second-day hair or adding a boho touch to loose waves. Instead of a physical headband, you create one out of hair. It frames the face beautifully.
Take a small section of hair from one side, near your temple. Fishtail braid it (just divide into two sections and cross small pieces over) until you reach the end. Pull it across your forehead to the other side and pin it discreetly behind your ear, tucking the end into your loose hair.

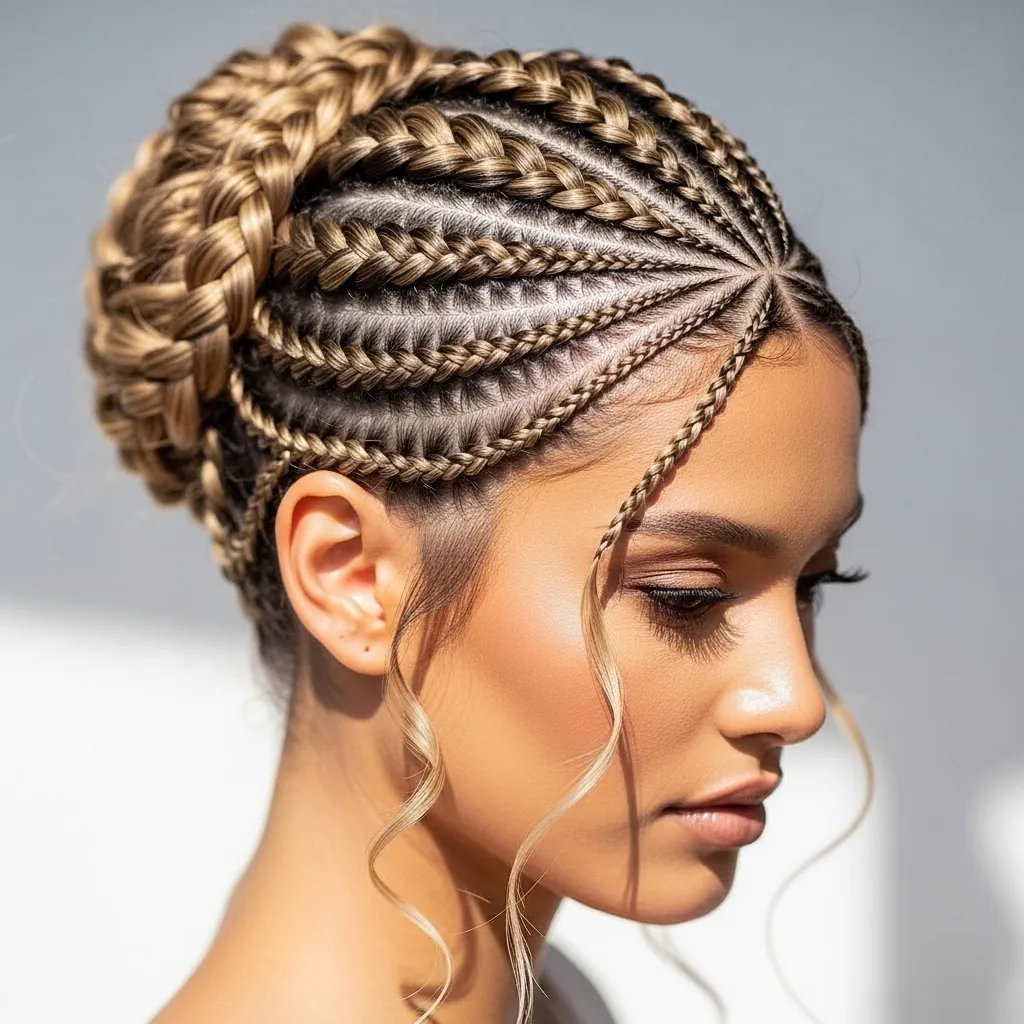
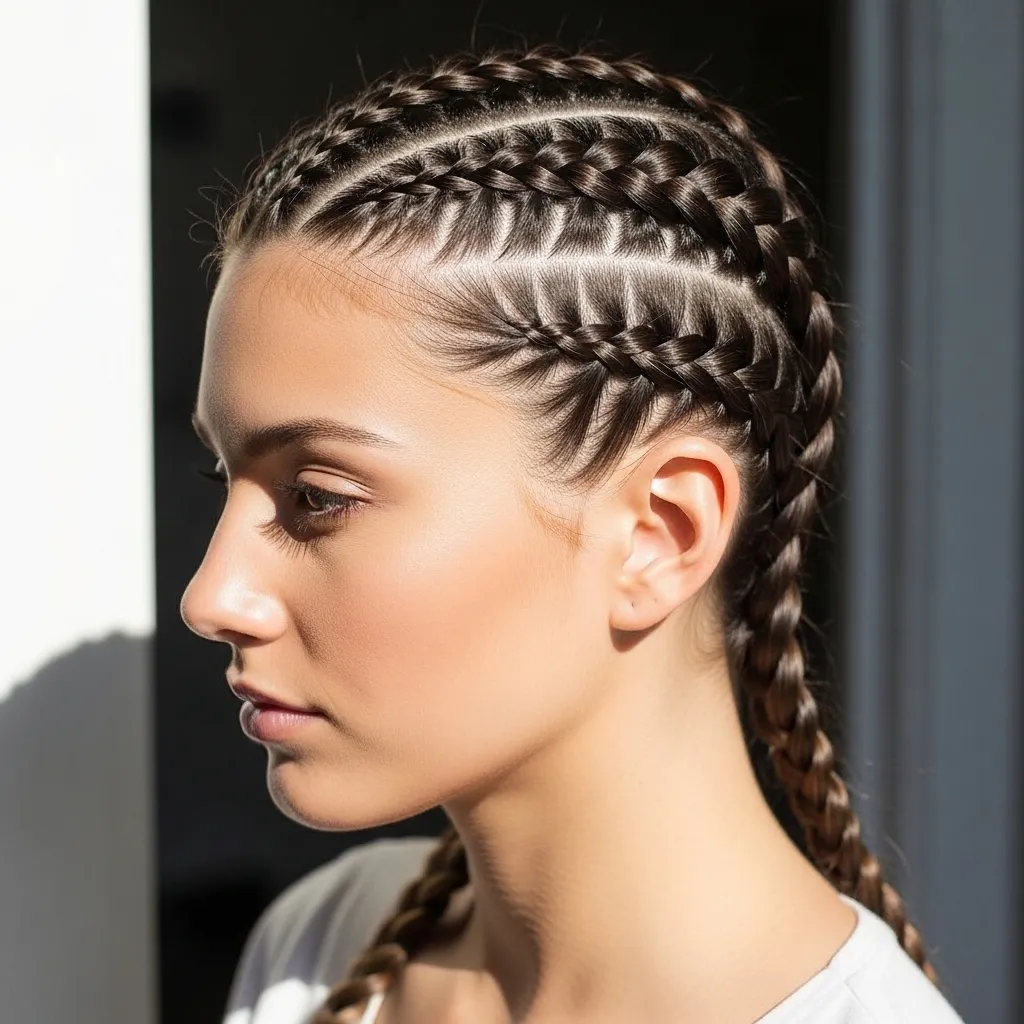
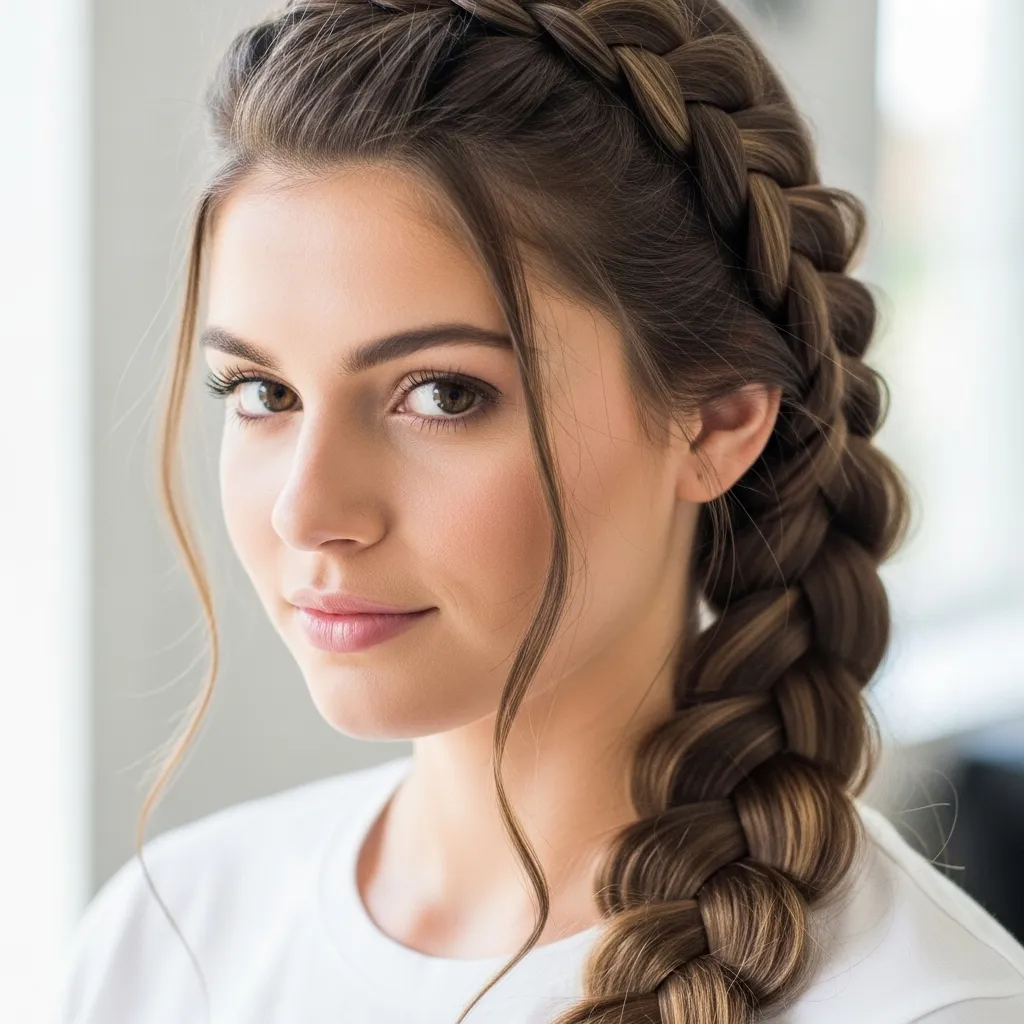
5. The Side-Swept Dutch Braid
If you know a regular French braid, try its cooler cousin: the Dutch braid. Instead of crossing sections over, you cross them under. This makes the braid pop *out* from your head for amazing dimension.
Start braiding at one temple, adding in hair from the top and sides as you go diagonally across the back of your head to the opposite side. It creates a gorgeous, woven headband effect that’s perfect for the gym or running errands in style.
6. The Messy Braided Ponytail
Elevate your basic ponytail in under a minute. This adds instant texture and interest. I do this when my hair isn’t cooperating but I still want to look put-together.
- Gather hair into a mid-height ponytail.
- Take a small section from the ponytail and braid it (a simple three-strand braid works perfectly).
- Wrap the small braid around the hair tie to conceal it and pin it in place.
Pull a few face-framing pieces loose for a soft finish.
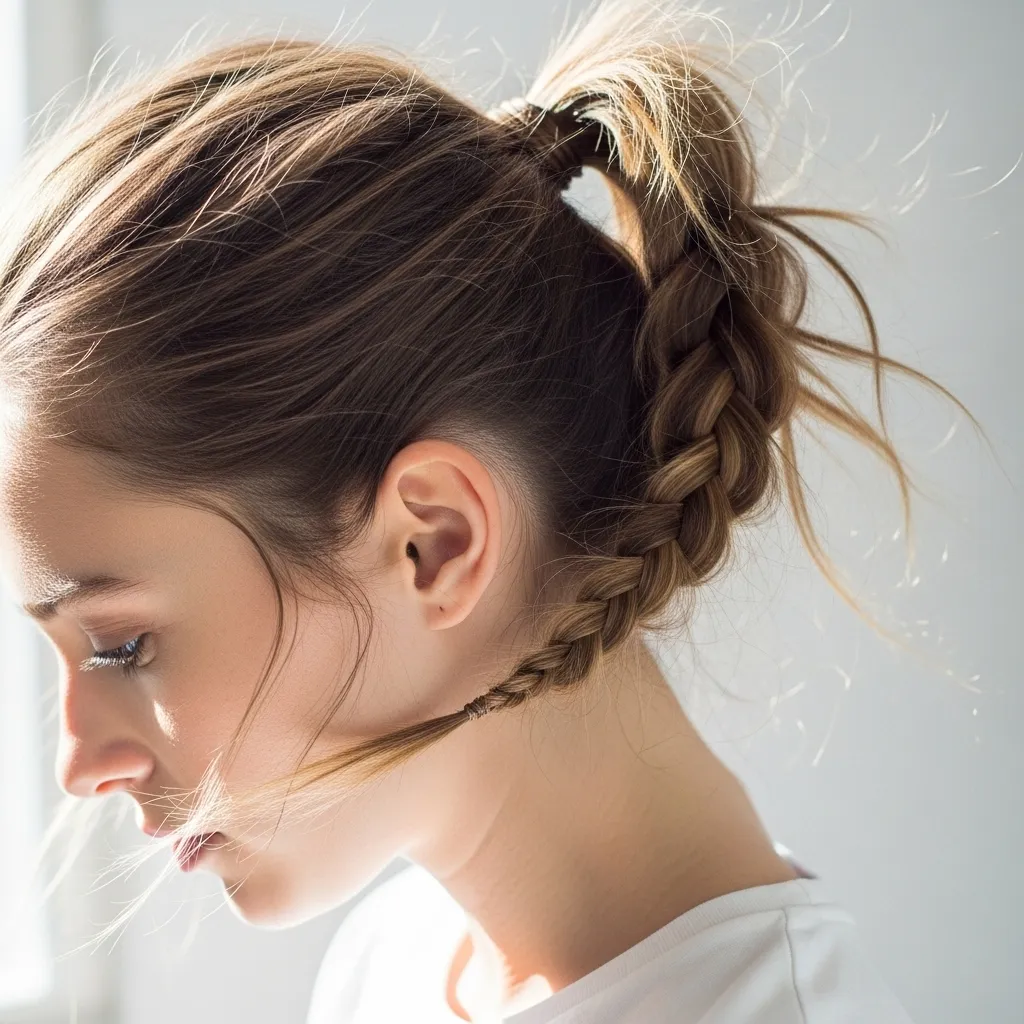
7. The Half-Up Braided Top Knot
This style combines two of my favorite things: braids and a top knot. It’s youthful, stylish, and keeps hair out of your eyes. Great for casual Fridays or a coffee date.
Take a triangular section of hair from the crown of your head. Braid it (French, Dutch, or simple) and secure the end with a clear elastic. Then, gather the braid and the rest of your top section into a small, messy bun on top of your head. Let the rest of your hair flow freely.
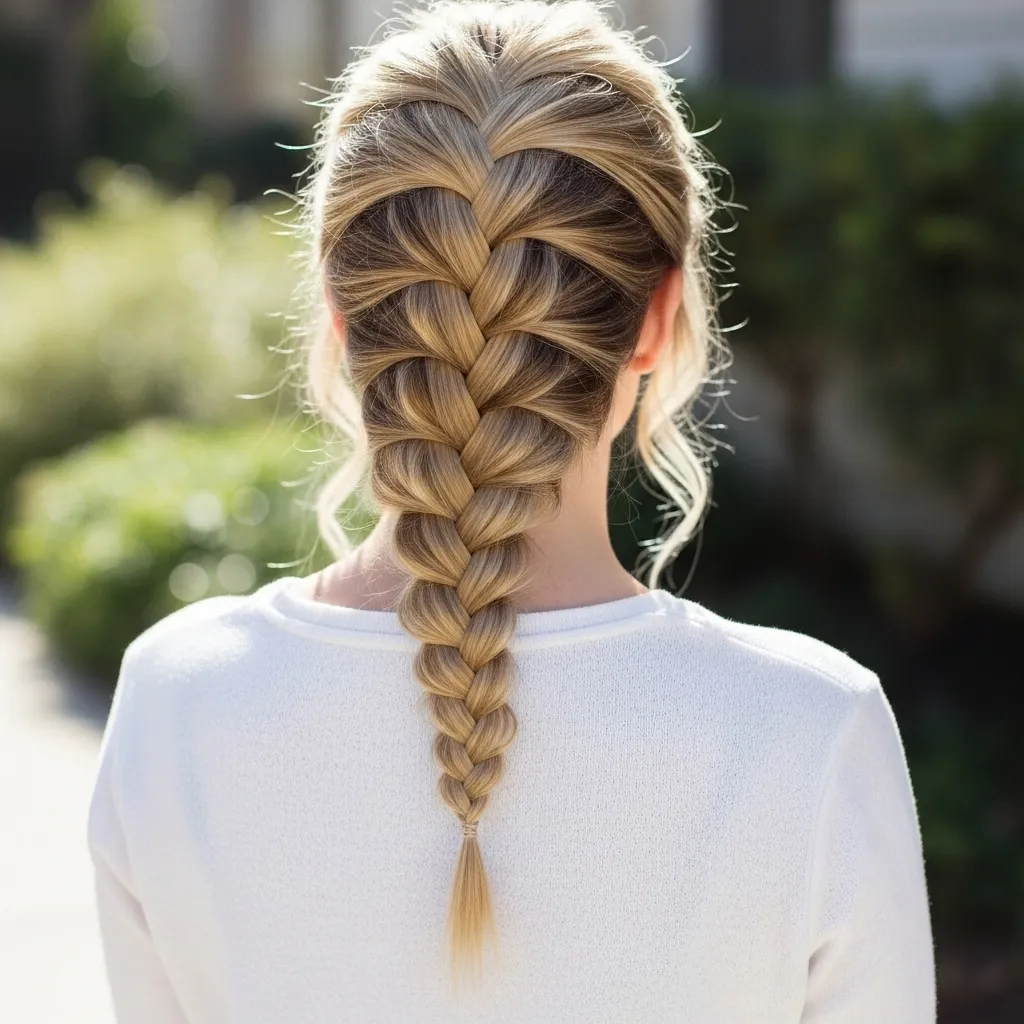
8. The Waterfall Braid
This braid looks like magic—hair seems to cascade down like a waterfall. It’s an ethereal and feminine look that’s perfect for special occasions or photos.
The trick is dropping a strand as you braid. Start a French braid near your part. Each time you add a new top section, drop the bottom strand from the braid and let it fall, picking up a new section from the top to continue. Practice makes perfect with this one!

9. The Four-Strand Flat Braid
Ready to level up your braiding? The four-strand braid creates a beautiful, flat, ribbon-like effect. It looks incredibly intricate but follows a simple pattern.
Divide hair into four equal sections. The pattern is: cross the far-right strand over two, then the far-left strand over two. Repeat. It takes a few tries to get the tension right, but the stunning result is worth it. Try this on a simple side braid first.
10. The Braided Low Chignon
For a sophisticated dinner or a job interview, this style is a winner. It’s elegant, neat, and stays impeccably in place. I feel instantly more confident with this hairstyle.
Create a low, loose ponytail. Braid the ponytail and wrap it into a coil at the nape of your neck, pinning as you go. Tuck the end under and secure with plenty of bobby pins. Smooth any flyaways with a bit of hairspray on a toothbrush.
11. The Pull-Through Braid
This is the ultimate cheat braid! It creates the look of a complex Dutch or French braid without any actual braiding technique. It’s my secret for a quick, voluminous look.
Create a series of ponytails down the back of your head. Split the ponytail above in two, and pull the next ponytail up through the split. Continue down the row. Once you reach the bottom, gently pull on the sides of each section to add volume and create that seamless braided illusion.
12. The Micro Braid Accents
Sometimes, less is more. Adding a few tiny, delicate braids to your natural hair is a subtle yet stunning detail. It’s perfect for adding a touch of personality to your everyday look.
Simply take a very thin section of hair near your part or temple and create a tight, small three-strand braid. You can do one or several. Let them blend into your loose hair or gather them back with a clip. It’s simple, edgy, and so cute.
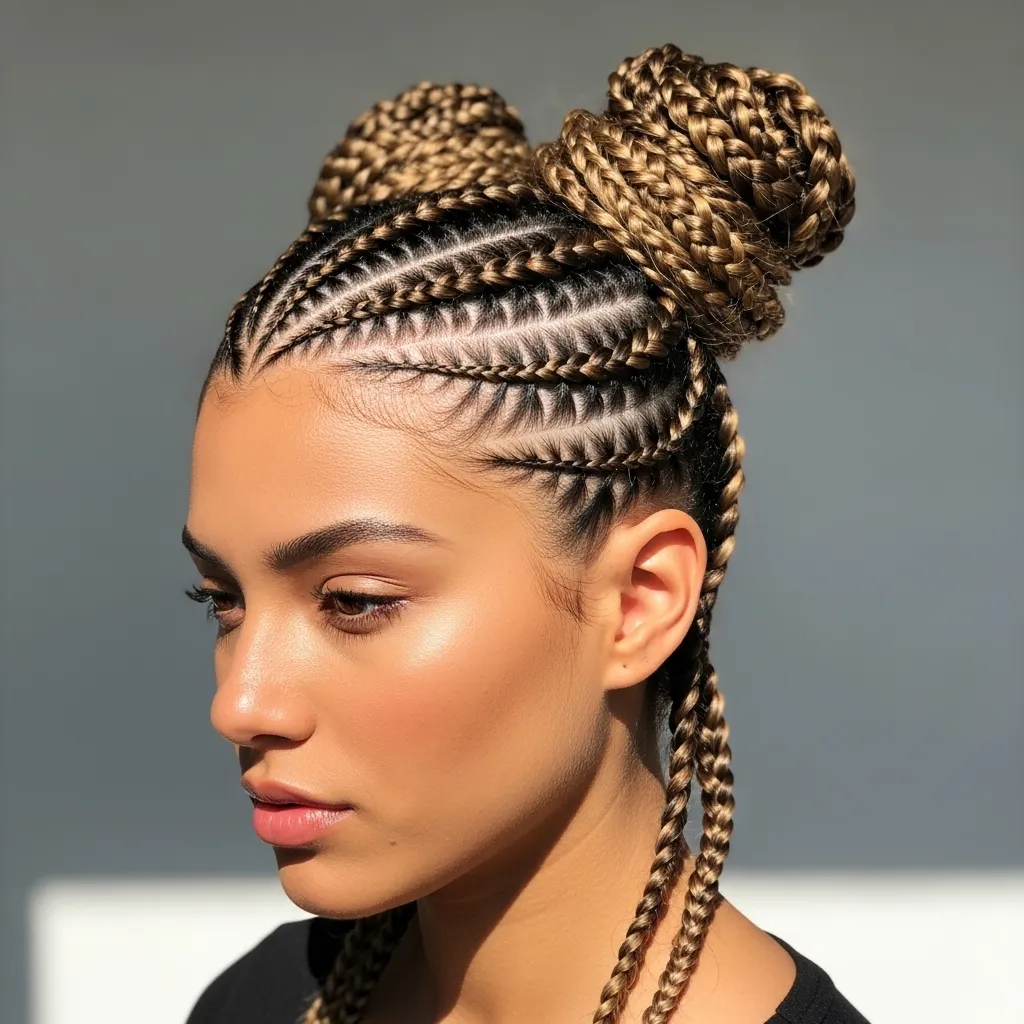
13. The Braided Space Buns
Double the fun! Space buns get an upgrade when you add braids. This playful style is energetic and perfect for a concert or a fun day with friends.
Part your hair down the middle. On each side, create a braid (any style you like!) from your temple back towards the crown. Then, gather the braid and the rest of that side’s hair into a high bun. Repeat on the other side for a perfectly symmetrical, quirky look.
Conclusion
Braids are truly the most versatile way to style your hair. I hope this list inspired you to try something new, whether it’s mastering a classic or playing with a trendy twist. Remember, the best part about braids is that they don’t have to be perfect—a little messiness adds character. So grab some hair ties and bobby pins, and have fun creating your next look!
Braided Hairstyles FAQ
Q: My hair is slippery and braids won’t hold. Any tips?
A: I feel you! Try braiding on day-old hair, or use a light texturizing spray or dry shampoo first. It adds the grip you need.
Q: What’s the easiest braid for a complete beginner?
A: Start with a simple three-strand braid on a ponytail or a side section. Once you master the rhythm, move on to a pull-through braid—it looks complex but is super easy.
Q: How can I make my braids look fuller and less tight?
A: After securing the end, gently pull on the outer loops of the braid with your fingertips. This “pancaking” technique loosens it and creates beautiful volume.
Q: Can I do these styles on short hair?
A: Absolutely! Many styles, like the braided headband, crown, or micro braids, work beautifully on shorter lengths. Use mini clear elastics and bobby pins to secure shorter pieces.
Q: How do I keep flyaways at bay?
A: A tiny bit of hairspray, edge control, or even clear mascara on a small brush can tame those baby hairs and give you a sleek finish.