
Easter is my favorite time to get creative with my nails. It’s not just about pastels anymore—it’s a whole spring festival at your fingertips! I love mixing soft colors with playful designs, from tiny bunnies to speckled egg effects. It feels like wearing a little bit of that hopeful, sunny spring energy right on my hands.
Whether you’re a nail art pro or prefer something simple you can do at home, there’s an idea here for you. I’ve gathered looks that range from sweet and subtle to full-on festive. The best part? You can mix and match these concepts to create your own perfect Easter manicure. Let’s jump into the cuteness!
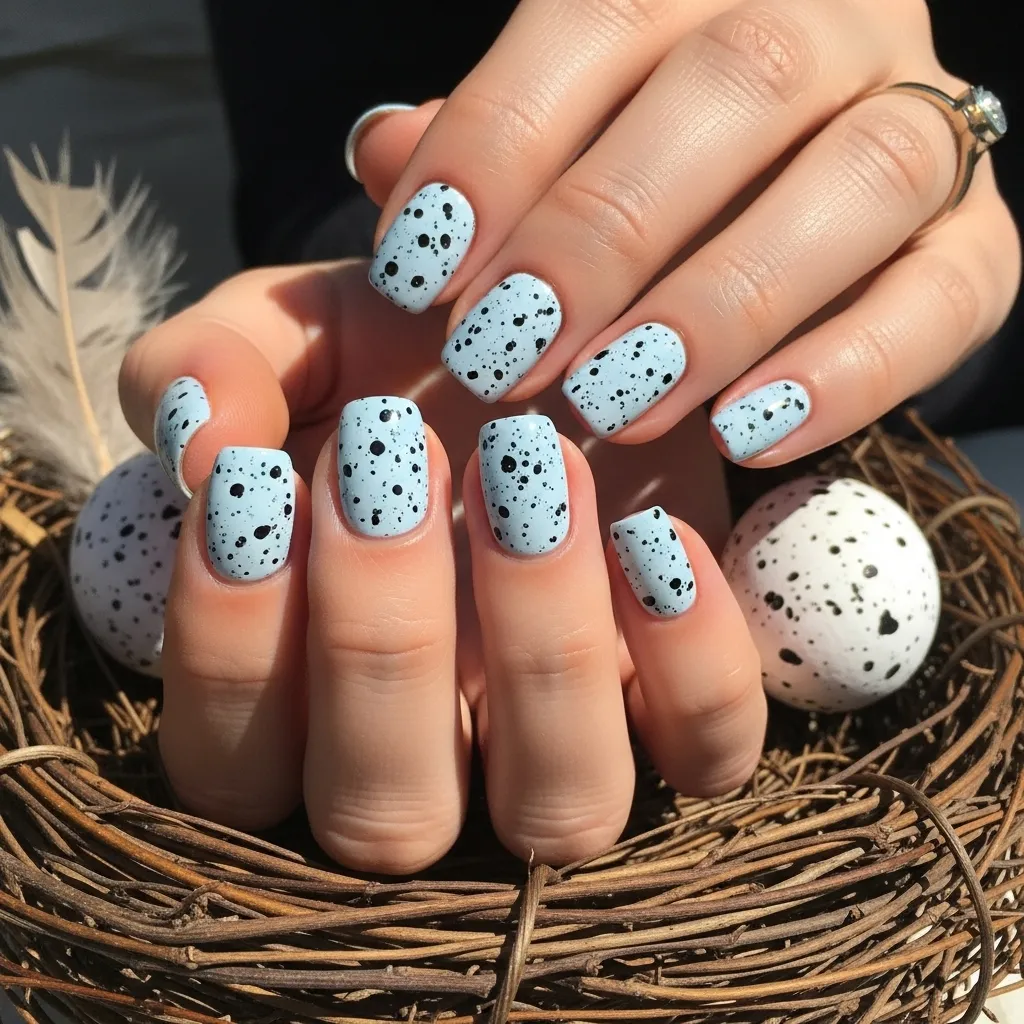
1. Speckled Easter Egg Nails
This design perfectly captures the charm of a dyed Easter egg. Start with a creamy pastel base—think baby blue, mint green, or soft lavender. The magic happens when you create the “speckles.”
My go-to method is the spray technique. Lightly dip an old toothbrush in a darker polish (like brown, navy, or charcoal) and flick your thumb over the bristles above your nail. It creates a natural, random speckle that looks just like the real thing! Seal it with a glossy top coat for that fresh eggshell shine.
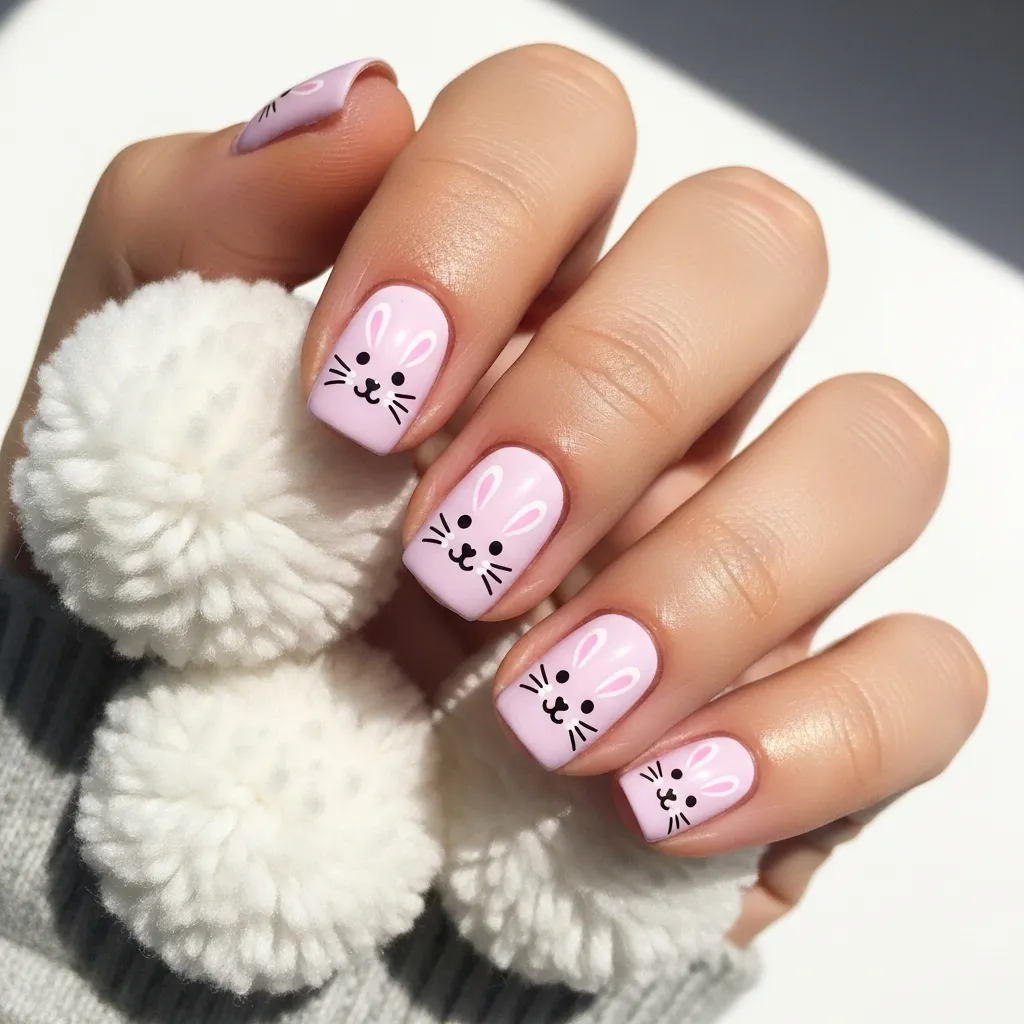
2. Adorable Bunny Faces
Is it even Easter without bunnies? Painting tiny bunny faces is easier than it looks. Use a dotting tool or the end of a bobby pin to create two white dots for the cheeks and a pink dot for the nose.
Then, add two tiny black dots for eyes and draw on some simple whiskers with a thin brush or a nail art pen. I love doing this on an accent nail against a soft pink or sky blue background. It’s impossibly sweet and always gets compliments.
3. Pastel French Tips with a Twist
Give the classic French manicure a springtime update. Instead of a white tip, use a cheerful pastel like lilac, mint, or buttercup yellow. For an extra Easter touch, I sometimes add a tiny design at the base of the tip.
- A single pearl
- A mini flower
- A delicate gold line
It’s elegant, fresh, and works for any occasion during the season. This is my top pick for a manicure that feels special but isn’t overly themed.

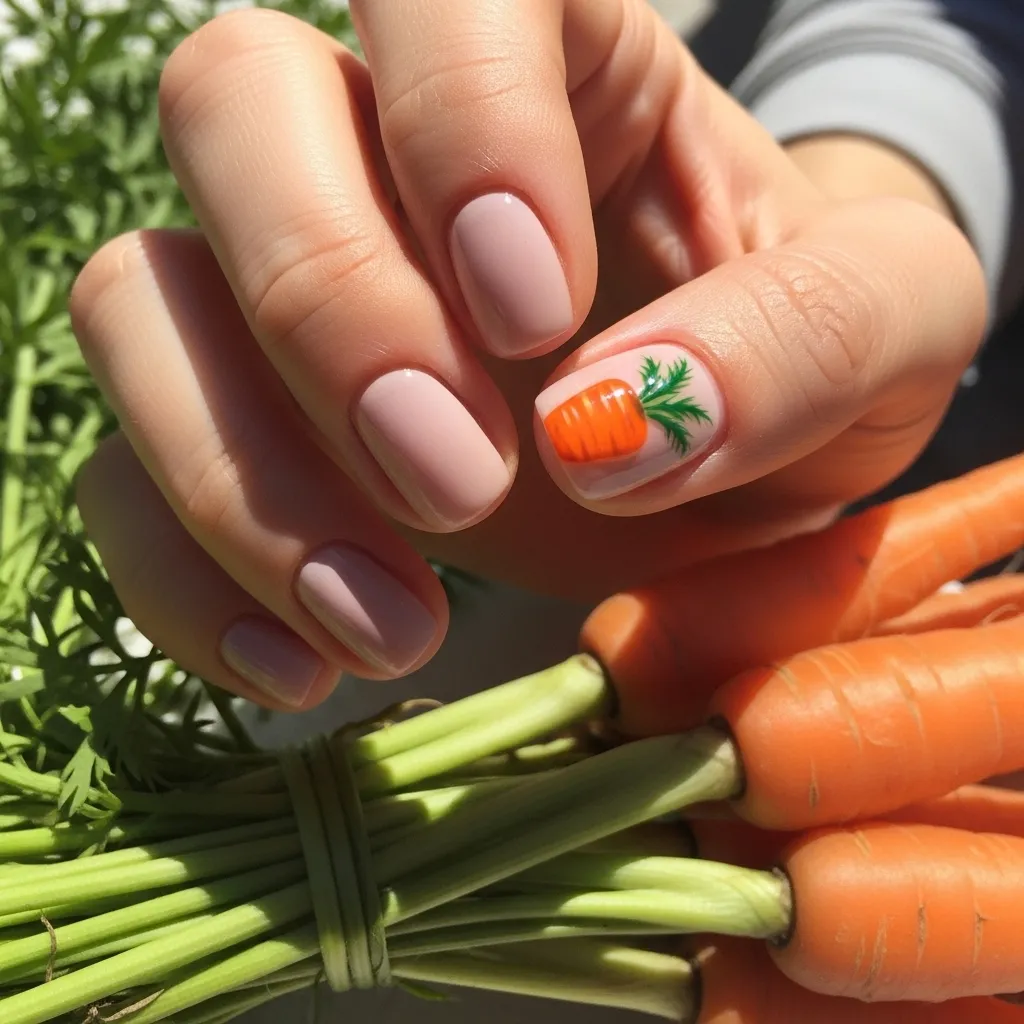
4. Carrot Accent Nail
This idea is so fun and graphic. Paint most of your nails a solid, leafy green—the color of carrot tops. Then, choose one or two accent nails for the carrot itself.
Paint a bright orange triangle starting at your cuticle and tapering toward the tip. Add a few short, messy green strokes at the base for the greens. It’s a simple, bold look that’s surprisingly chic and totally festive.
5. Floral Meadow Nails
Spring is all about flowers blooming, so why not wear a meadow on your nails? Start with a gradient background using two soft colors, like pale yellow fading into peach.
Then, using a thin brush or dotting tools, add tiny daisies, simple five-petal flowers, or even little forget-me-nots. Scatter them across a few nails. I like to keep the flowers small and delicate for a dainty, garden-party vibe.

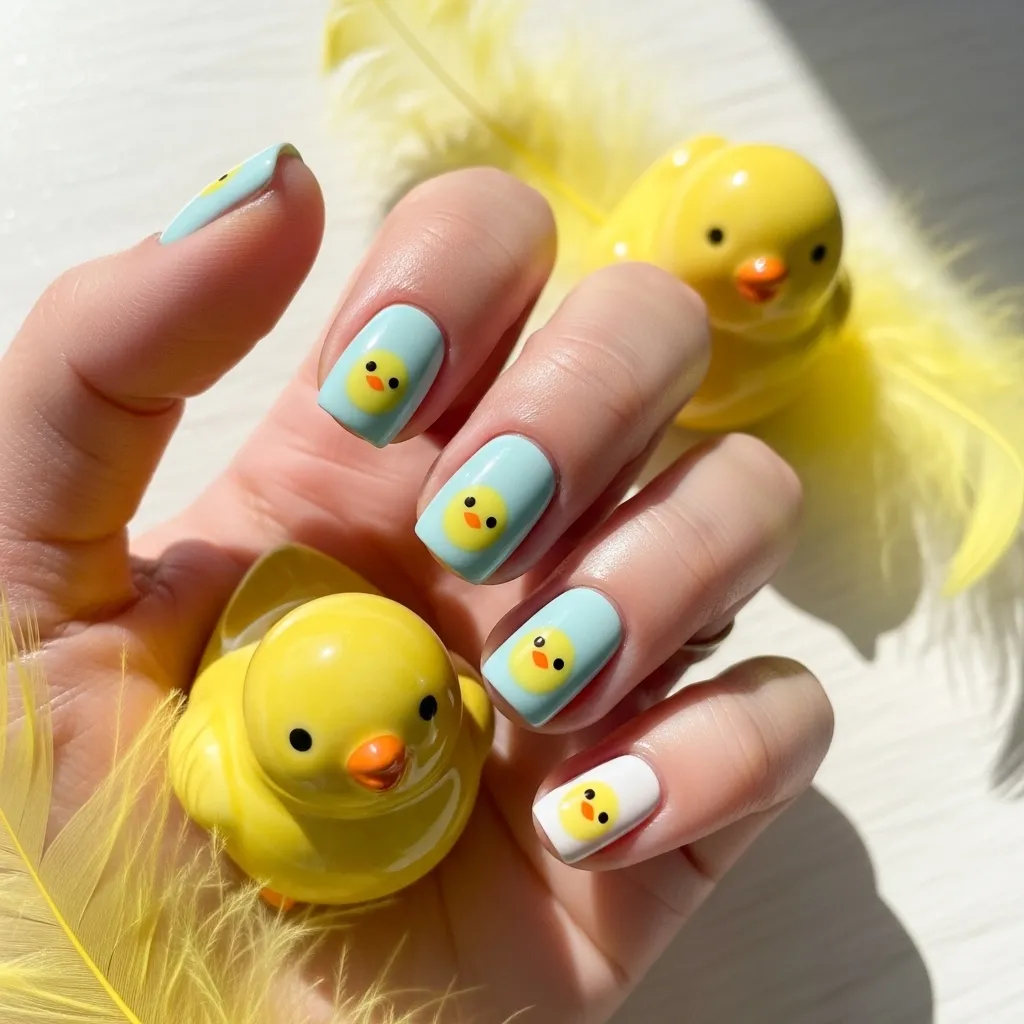
6. Little Yellow Chicks
This design is pure joy. Paint your nails a clean, light blue to mimic a spring sky. Then, on one or two accent nails, create your chick.
Use a sunny yellow polish to paint a small, slightly irregular circle. Add an orange triangle for the beak and two tiny black dots for eyes. You can even give it little orange feet! It’s a cheerful, whimsical detail that makes me smile every time I look at my hands.
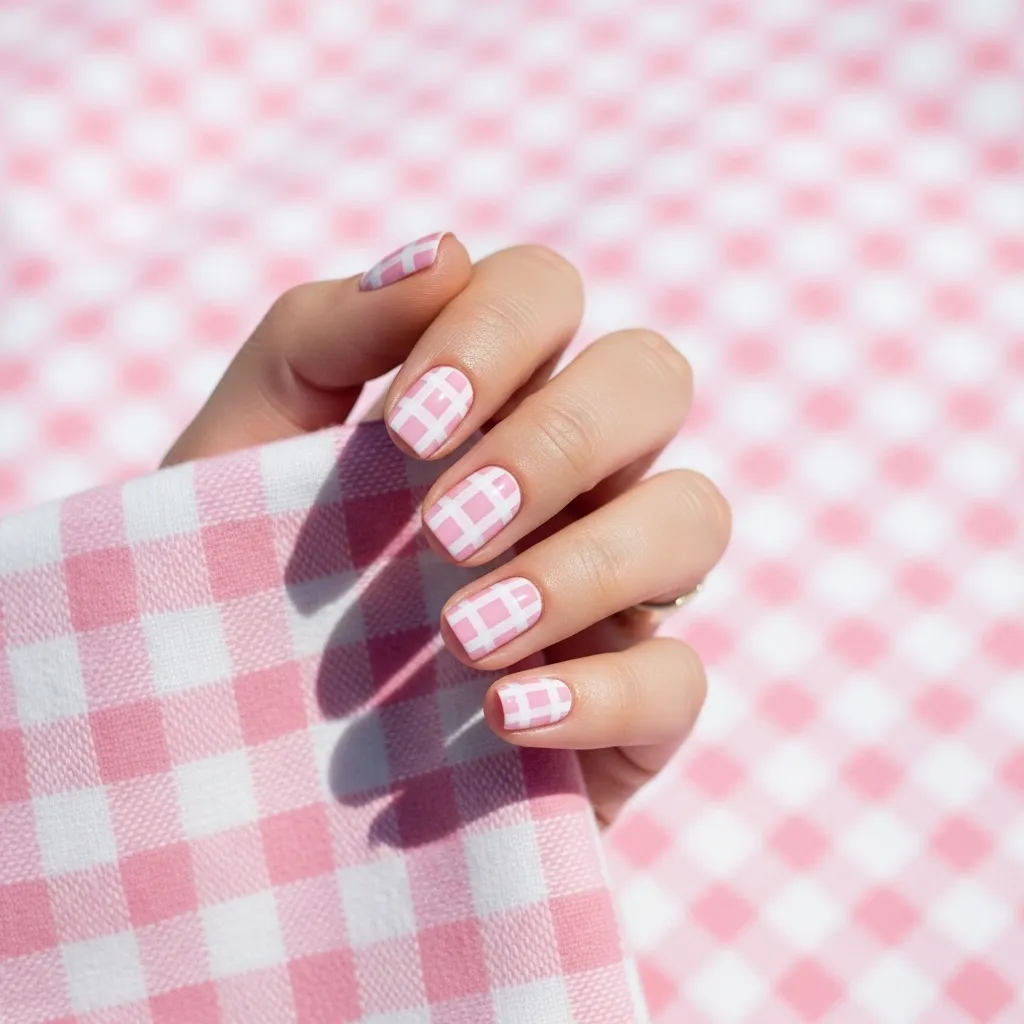
7. Gingham & Checkerboard
Gingham is the ultimate picnic-and-Easter pattern. It looks complicated, but it’s just a grid! Paint your nail with a white or pastel base. Once it’s completely dry, use a thin brush or a striping tape to create a grid of lines in a contrasting color.
Baby blue and white, pink and white, or lavender and white are my favorite combos. It creates a fresh, homemade feel that’s perfectly on theme.
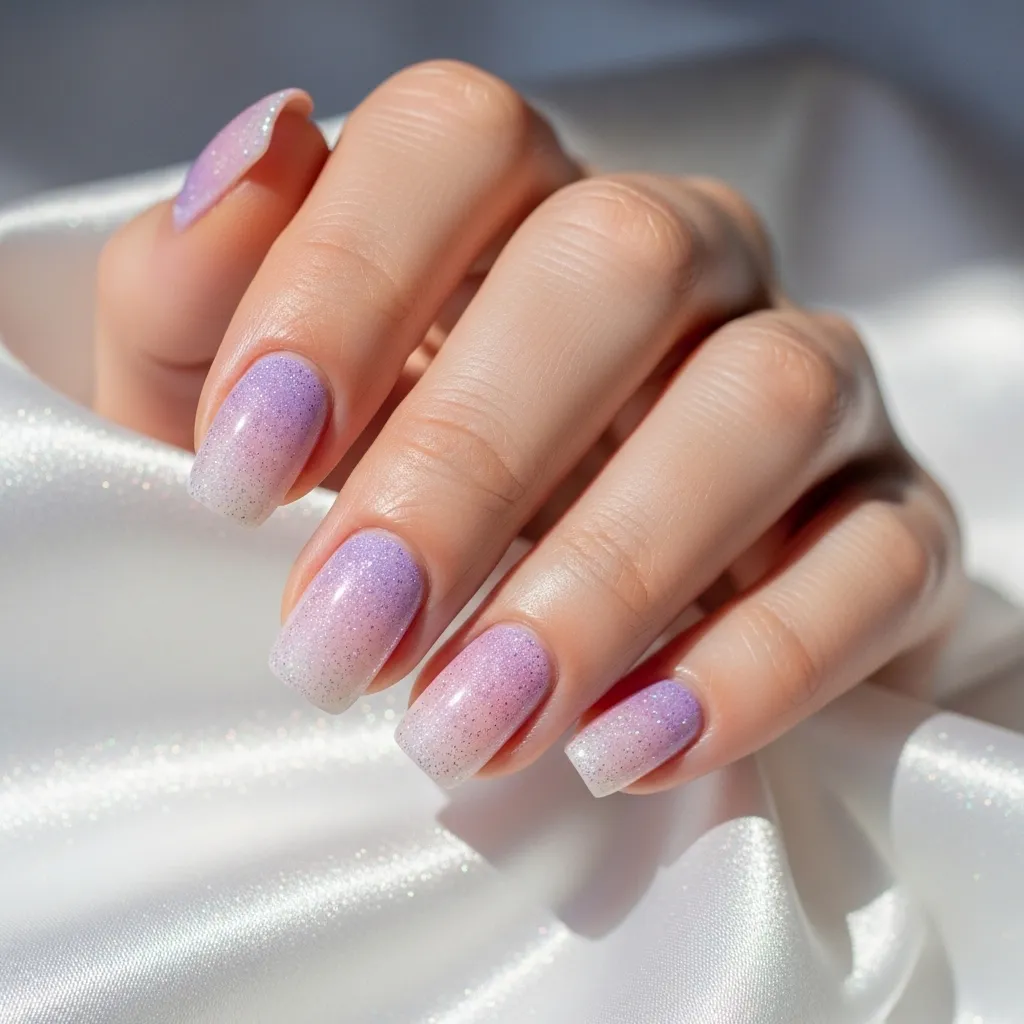
8. Shimmery Pastel Ombré
For a dreamy, ethereal look, you can’t beat a pastel ombré. Blend two or three soft shimmery polishes together on each nail. Think pearly pink fading into iridescent lilac, or a metallic mint blending into a soft gold.
The shimmer catches the light beautifully and looks like a spring sunrise. It’s a low-effort, high-impact look that feels very special and elegant.
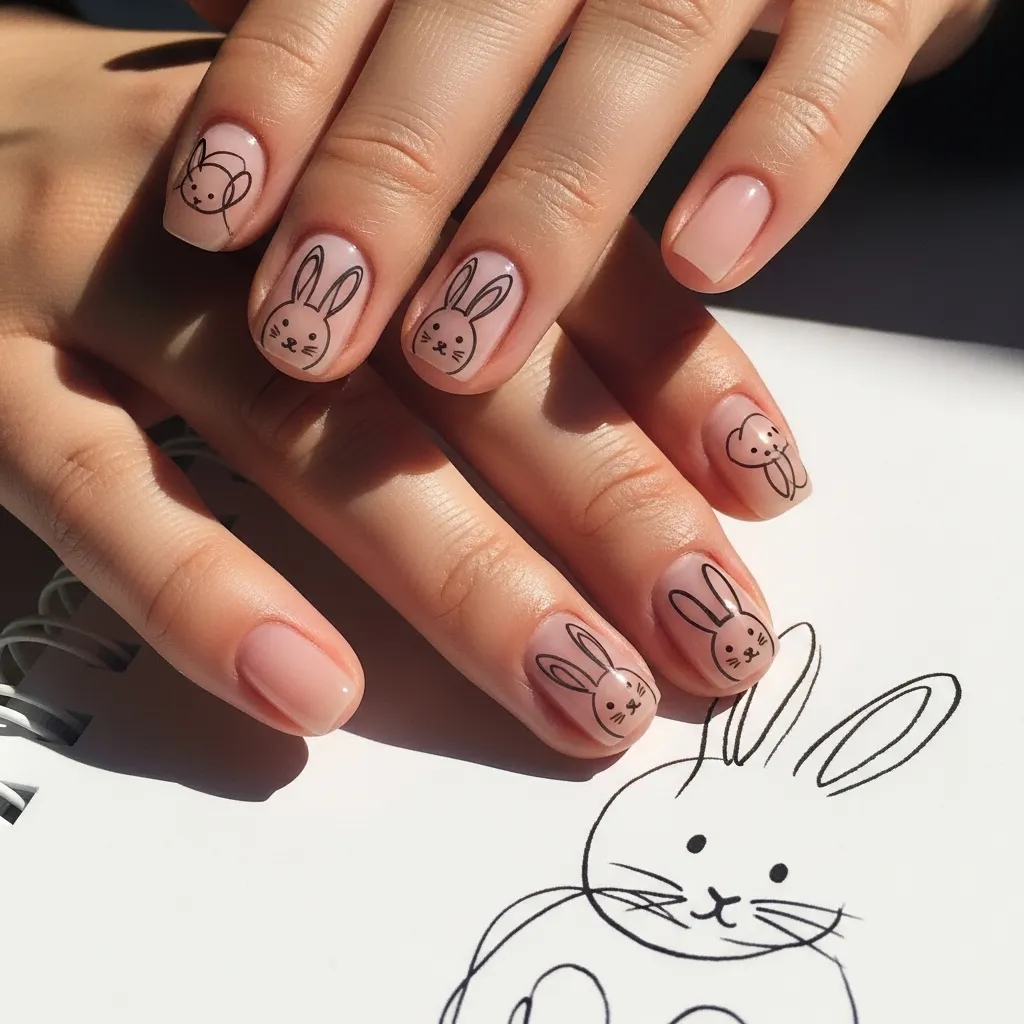
9. Minimalist Line Art Bunnies
If you love clean, modern nail art, this is for you. Paint your nails in a neutral nude or crisp white. Then, using a fine-line brush and black or navy polish, draw a simple, outline-only bunny silhouette on one nail.
You can draw it sitting, hopping, or just a profile of its ears. It’s understated, artistic, and a super chic way to nod to the holiday. Sometimes less really is more.
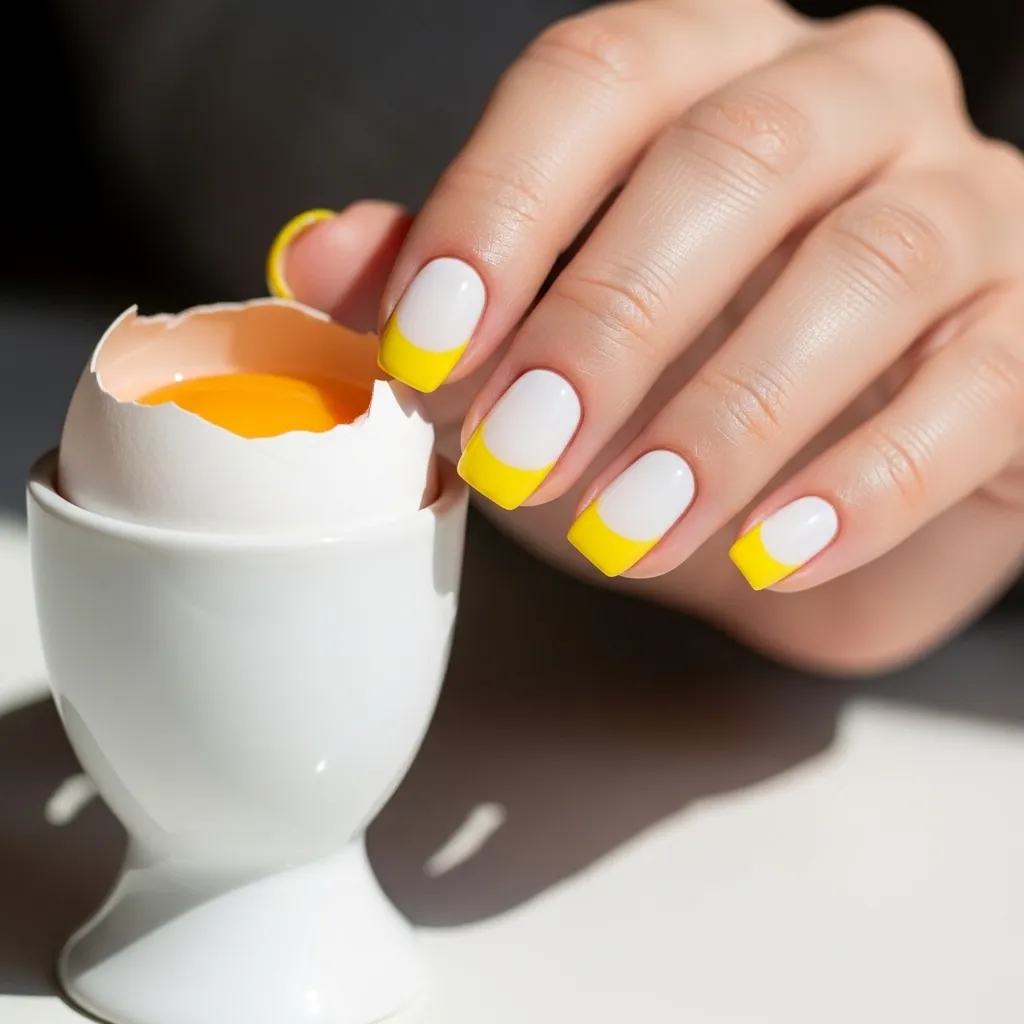
10. “Dipped in Yolk” Nails
This playful trend is so cute for Easter! Paint the majority of your nail a clean white, like an egg white. Then, at the tip, create a curved, dripping line of glossy, sunshine yellow polish to look like runny yolk.
Make the line imperfect for a more realistic look. It’s quirky, fun, and a great conversation starter. Perfect for anyone with a sense of humor about their holiday style.
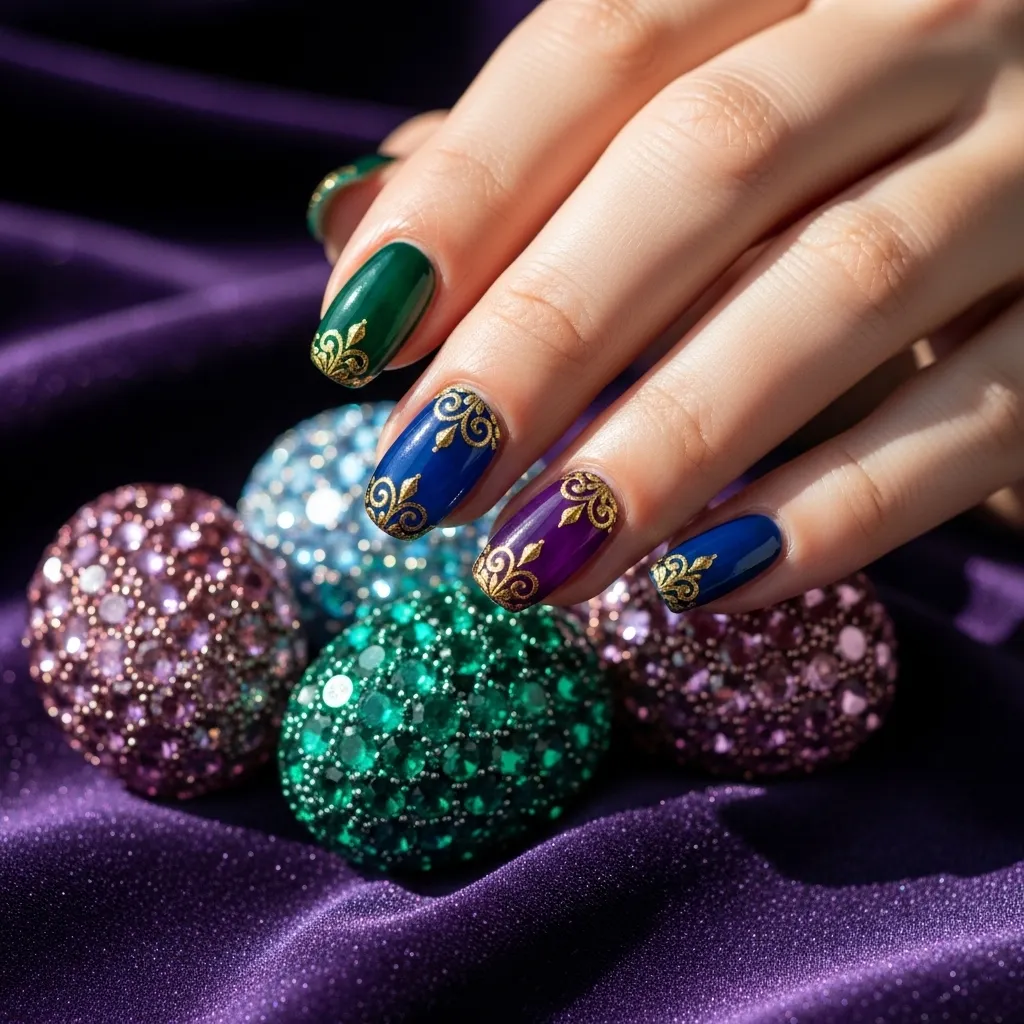
11. Jewel-Toned Easter Eggs
Step away from the pastels with rich, jewel-toned eggs. Deep emerald, sapphire blue, and amethyst purple feel so luxurious. Paint each nail a different deep, glossy color.
Then, add delicate gold foil flakes, thin gold line work, or tiny metallic dots as “decoration.” It gives off major fancy, hand-painted Ukrainian egg vibes and feels incredibly sophisticated for the season.
Wrap-Up & Tips for Your Easter Mani
I hope these ideas inspire your own Easter nail creations! My biggest tip is to have fun with it and not stress about perfection. A wobbly bunny or uneven speckle just adds to the handmade charm. Use a good base and top coat to make your design last through all the egg hunts and brunches.
Remember, you can always adapt these ideas. Try bunny faces on a speckled egg background, or add a single carrot to a pastel French tip. Mix, match, and make it your own!
Easter Nail Art FAQ
Q: I’m not good at nail art. What’s the easiest idea to try?
A: Speckled eggs or a pastel French tip are the most beginner-friendly! They require minimal precision and look fantastic.
Q: What colors scream “Easter”?
A: The classic pastel palette: mint green, baby pink, buttercup yellow, lavender, sky blue, and peach. Don’t forget crisp white!
Q: How can I make my design last longer?
A: Always use a base coat, let each layer dry completely, and seal everything with a high-quality top coat. Avoid using your nails as tools.
Q: Can I do these on short nails?
A: Absolutely! In fact, minimalist designs like line art bunnies or single carrots often look even better on shorter, neat nails.
Q: What if I don’t have nail art tools?
A: Get creative! A toothpick works as a dotting tool, an old makeup sponge creates ombré, and scotch tape can help make clean lines for French tips or gingham.